Here i am going to explain how to create a maven project which can be used to connect your Local AEM instance and play with content.
- Step1 : Create a maven project structure
- Step2: Create a JAVA class that can be used to connect with your local AEM instance
- Step3: Update pom.xml file for adding the dependencies and profile.
- Step4: Compile/package your code by maven command
- Step5: Run your Compiled java class to test the connectivity and the JCR operations of workspace copy.
Step1: Create a maven project structure.
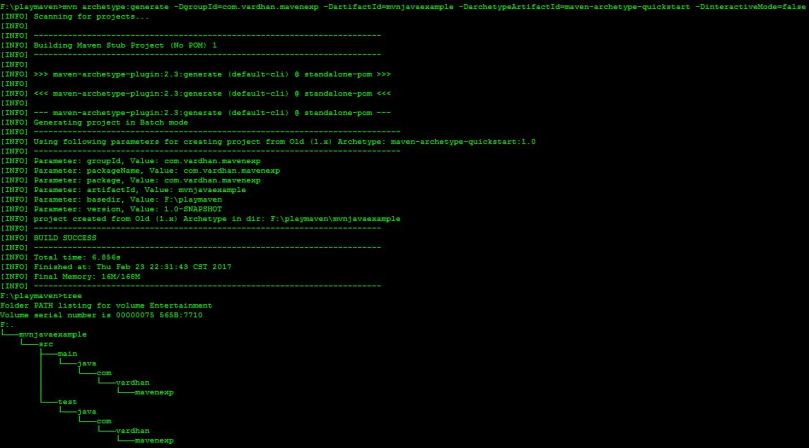
mvn archetype:generate -DgroupId=com.vardhan.mavenexp -DartifactId=mvnjavaexample -DarchetypeArtifactId=maven-archetype-quickstart -DinteractiveMode=false
here i have used a simple maven quickstart archetype to generate a folder structure for my project once i execute the above command it will create the following folder structure.
Step2: Create a JAVA class that can be used to connect with your local AEM instance.
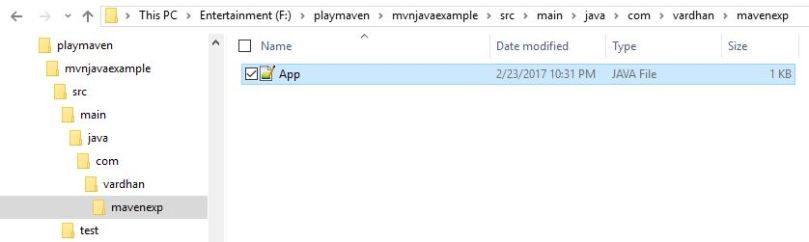
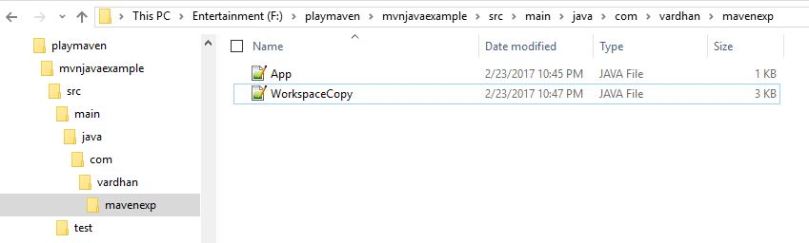
you can rename the App.java file to your wish name and place the below code into that new/renamed java file. (Here i have created additional new file named WorkspaceCopyTest.java which contains the below code)
package com.vardhan.mavenexp;
/**
* A simple JCR play Class
*/import javax.jcr.Repository;
import javax.jcr.Session;
import javax.jcr.SimpleCredentials;
import javax.jcr.Node;
import javax.jcr.Workspace;
import org.apache.jackrabbit.commons.JcrUtils;
import org.apache.jackrabbit.core.TransientRepository;
import javax.jcr.NodeIterator;public class WorkspaceCopy {
public static void main(String[] args) throws Exception {
try {
//Create a connection to the CQ repository running on local host
Repository repository = JcrUtils.getRepository(“http://localhost:4502/crx/server”);//Create a Session
//javax.jcr.Session session = repository.login( new SimpleCredentials(“admin”, “admin”.toCharArray()));
String WORKSPACE = “crx.default”;
javax.jcr.Session session = repository.login(new SimpleCredentials(“admin”, “admin”.toCharArray()), WORKSPACE);
Workspace workspace = session.getWorkspace();
Node root = session.getRootNode();
// Source and Destination paths
Node srcnodepath = root.getNode(“./content/dam/geometrixx/portraits”);
Node destnode = root.getNode(“./content/dam/geometrixx/test/”);if (srcnodepath.hasNodes()) {
NodeIterator worknodes = srcnodepath.getNodes();
while (worknodes.hasNext()) {
Node childnde = worknodes.nextNode();
// formation of destination path and its relative path variables
String[] parts = childnde.getPath().split(“/”);
String destrelativepath = parts[((parts.length) – 1)];
String destpath = destnode.getPath() + “/” + parts[((parts.length) – 1)];
// calling validate destination method to verify if destination path already exist then will not create node again.
if (validatedestpath(destnode, destrelativepath)) {
workspace.copy(childnde.getPath(), destpath);
}
}
}
System.out.println(“:::Hurray workspace copy completed:::”);
session.logout();
} catch (Exception e) {
e.printStackTrace();
}
}
static Boolean validatedestpath(Node destnode, String destrelativepath) {
try {
if (destnode.hasNode(destrelativepath)) {
return false;
}
} catch (Exception e) {
e.printStackTrace();
}
return true;
}
}
Step3: Update pom.xml file for adding the dependencies and profile.
open the pom.xml file and update it as shown below. here i have added JCR dependencies as well as one profile to call main class in install phase.
<project xmlns=”http://maven.apache.org/POM/4.0.0″ xmlns:xsi=”http://www.w3.org/2001/XMLSchema-instance”
xsi:schemaLocation=”http://maven.apache.org/POM/4.0.0 http://maven.apache.org/maven-v4_0_0.xsd”>
<modelVersion>4.0.0</modelVersion>
<groupId>com.vardhan.mavenexp</groupId>
<artifactId>mvnjavaexample</artifactId>
<packaging>jar</packaging>
<version>1.0-SNAPSHOT</version>
<name>mvnjavaexample</name>
<url>http://maven.apache.org</url>
<dependencies>
<dependency>
<groupId>junit</groupId>
<artifactId>junit</artifactId>
<version>3.8.1</version>
<scope>test</scope>
</dependency>
<dependency>
<groupId>javax.jcr</groupId>
<artifactId>jcr</artifactId>
<version>2.0</version>
</dependency><!– https://mvnrepository.com/artifact/org.apache.jackrabbit/jackrabbit-jcr-commons –>
<dependency>
<groupId>org.apache.jackrabbit</groupId>
<artifactId>jackrabbit-jcr-commons</artifactId>
<version>2.2.0</version>
</dependency>
<!– https://mvnrepository.com/artifact/org.apache.jackrabbit/jackrabbit-core –>
<dependency>
<groupId>org.apache.jackrabbit</groupId>
<artifactId>jackrabbit-core</artifactId>
<version>2.14.0</version>
</dependency>
<!– https://mvnrepository.com/artifact/org.apache.jackrabbit/jackrabbit-jcr2dav –>
<dependency>
<groupId>org.apache.jackrabbit</groupId>
<artifactId>jackrabbit-jcr2dav</artifactId>
<version>2.14.0</version>
</dependency><!– The SFL4J logging implementation you prefer –>
<dependency>
<groupId>org.slf4j</groupId>
<artifactId>slf4j-simple</artifactId>
<version>1.7.21</version>
</dependency>
</dependencies>
<profiles>
<profile>
<id>vardhan-mvnjava</id>
<build>
<plugins>
<plugin>
<groupId>org.codehaus.mojo</groupId>
<artifactId>exec-maven-plugin</artifactId>
<version>1.1.1</version>
<executions>
<execution>
<phase>install</phase>
<goals>
<goal>java</goal>
</goals>
<configuration>
<mainClass>com.vardhan.mavenexp.WorkspaceCopy</mainClass>
<arguments>
<argument>arg0</argument>
<argument>arg1</argument>
</arguments>
</configuration>
</execution>
</executions>
</plugin>
</plugins>
</build>
</profile>
</profiles></project>
Step4: Compile/package your code by maven command.
mvn clean package
Use the above command at mvnjavaexample folder where your pom.xml file exists.
it might take some time for the first time build to download the dependencies, make sure you are not behind the proxy else you need to setup your maven to use proxy settings.
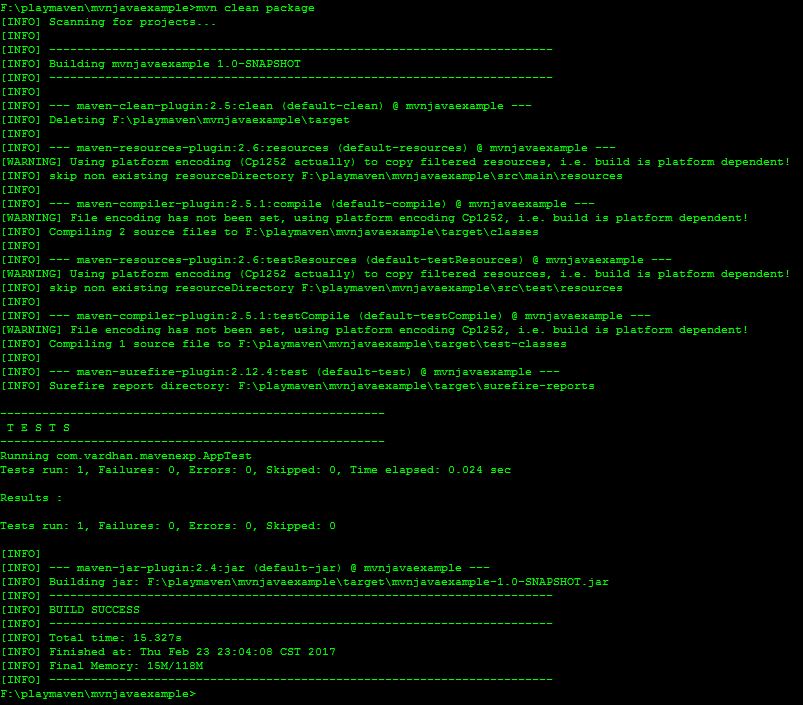
you can verify in the compiled classes and a jar build with your classes inside target folder.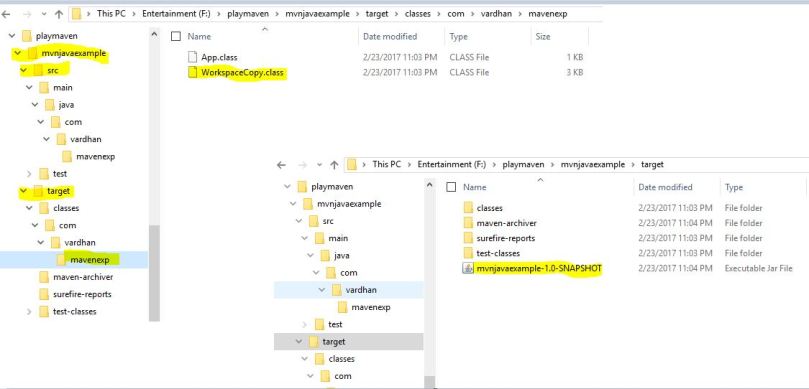
Step5: Run your Compiled java class to test the connectivity to local instance and the JCR workspace copy operation.
Now its time to run the class and see if our code snippet works fine.
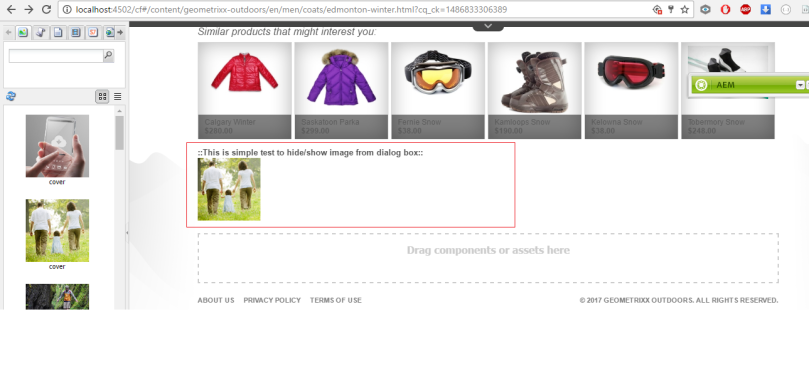
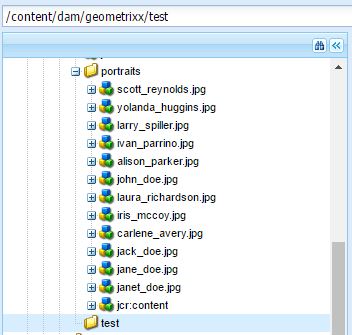
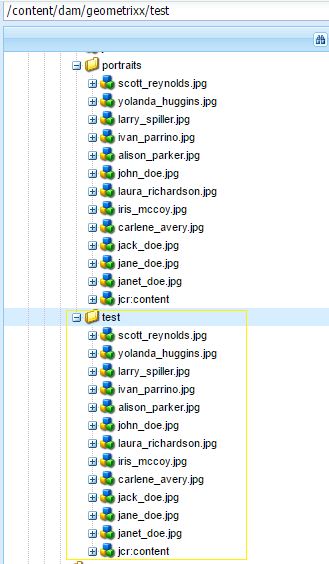
In this code i have taken source path as /content/dam/geometrixx/portraits which contains some images as shown below and destination path as /content/dam/geometrixx/test/ which is an empty folder.
Now lets run the below maven command to call our WorkspaceCopy class and execute the workspace.copy operation between the source path and destination path.
mvn exec:java -Dexec.mainClass=”com.vardhan.mavenexp.WorkspaceCopy“
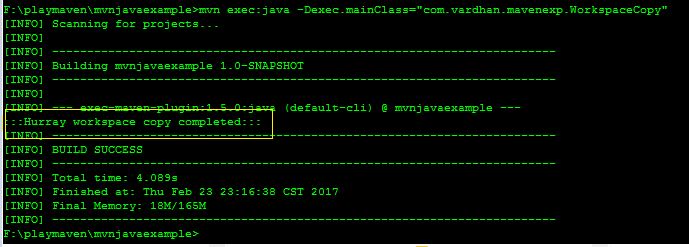
once you got the success message in your command prompt you should be able to see the nodes got copied to your test folder.
You can test the code by deleting any nodes under test and re run the above maven command which will recreate the deleted nodes again.
The same class can also be called by using the maven profile created in our pom.xml file with the below command.
mvn install -Pvardhan-mvnjava
The Help sample has been created and executed with below versions of dependencies.
Maven Version: apache-maven-3.1.1
Java version: 1.7.0_45
AEM Version: 6.2